Drink Capsule: Can Heater and Cooler
A 10-inch 3D-printed capsule that keeps a can of soda cold (or warms it up) with a Peltier tile and four rechargeable batteries, with a full how-to manual.
Work in progress. Designed with a full manual, but not built yet: the parts haven't been bought. A few sizes in the design are best guesses until the real parts are measured, so print the test pieces first.
What you need
What it is
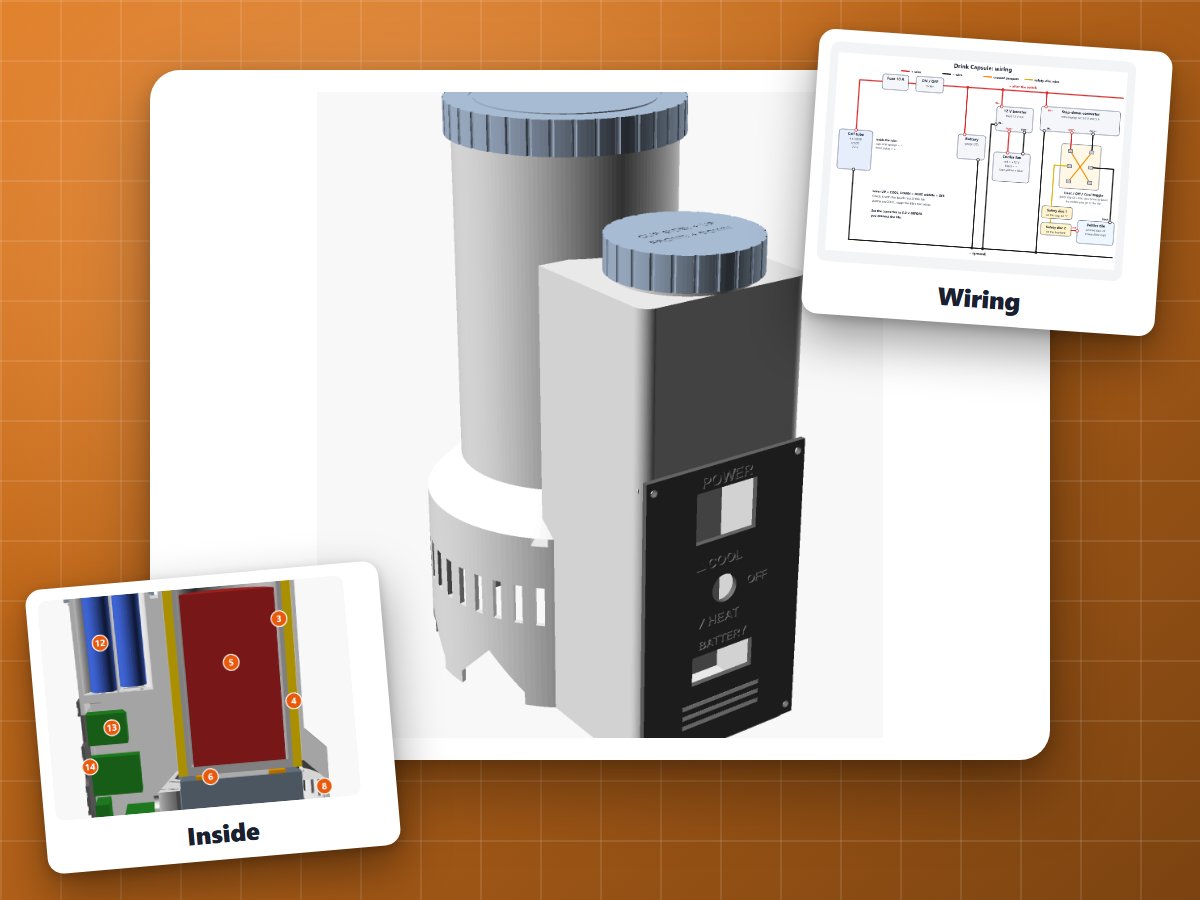
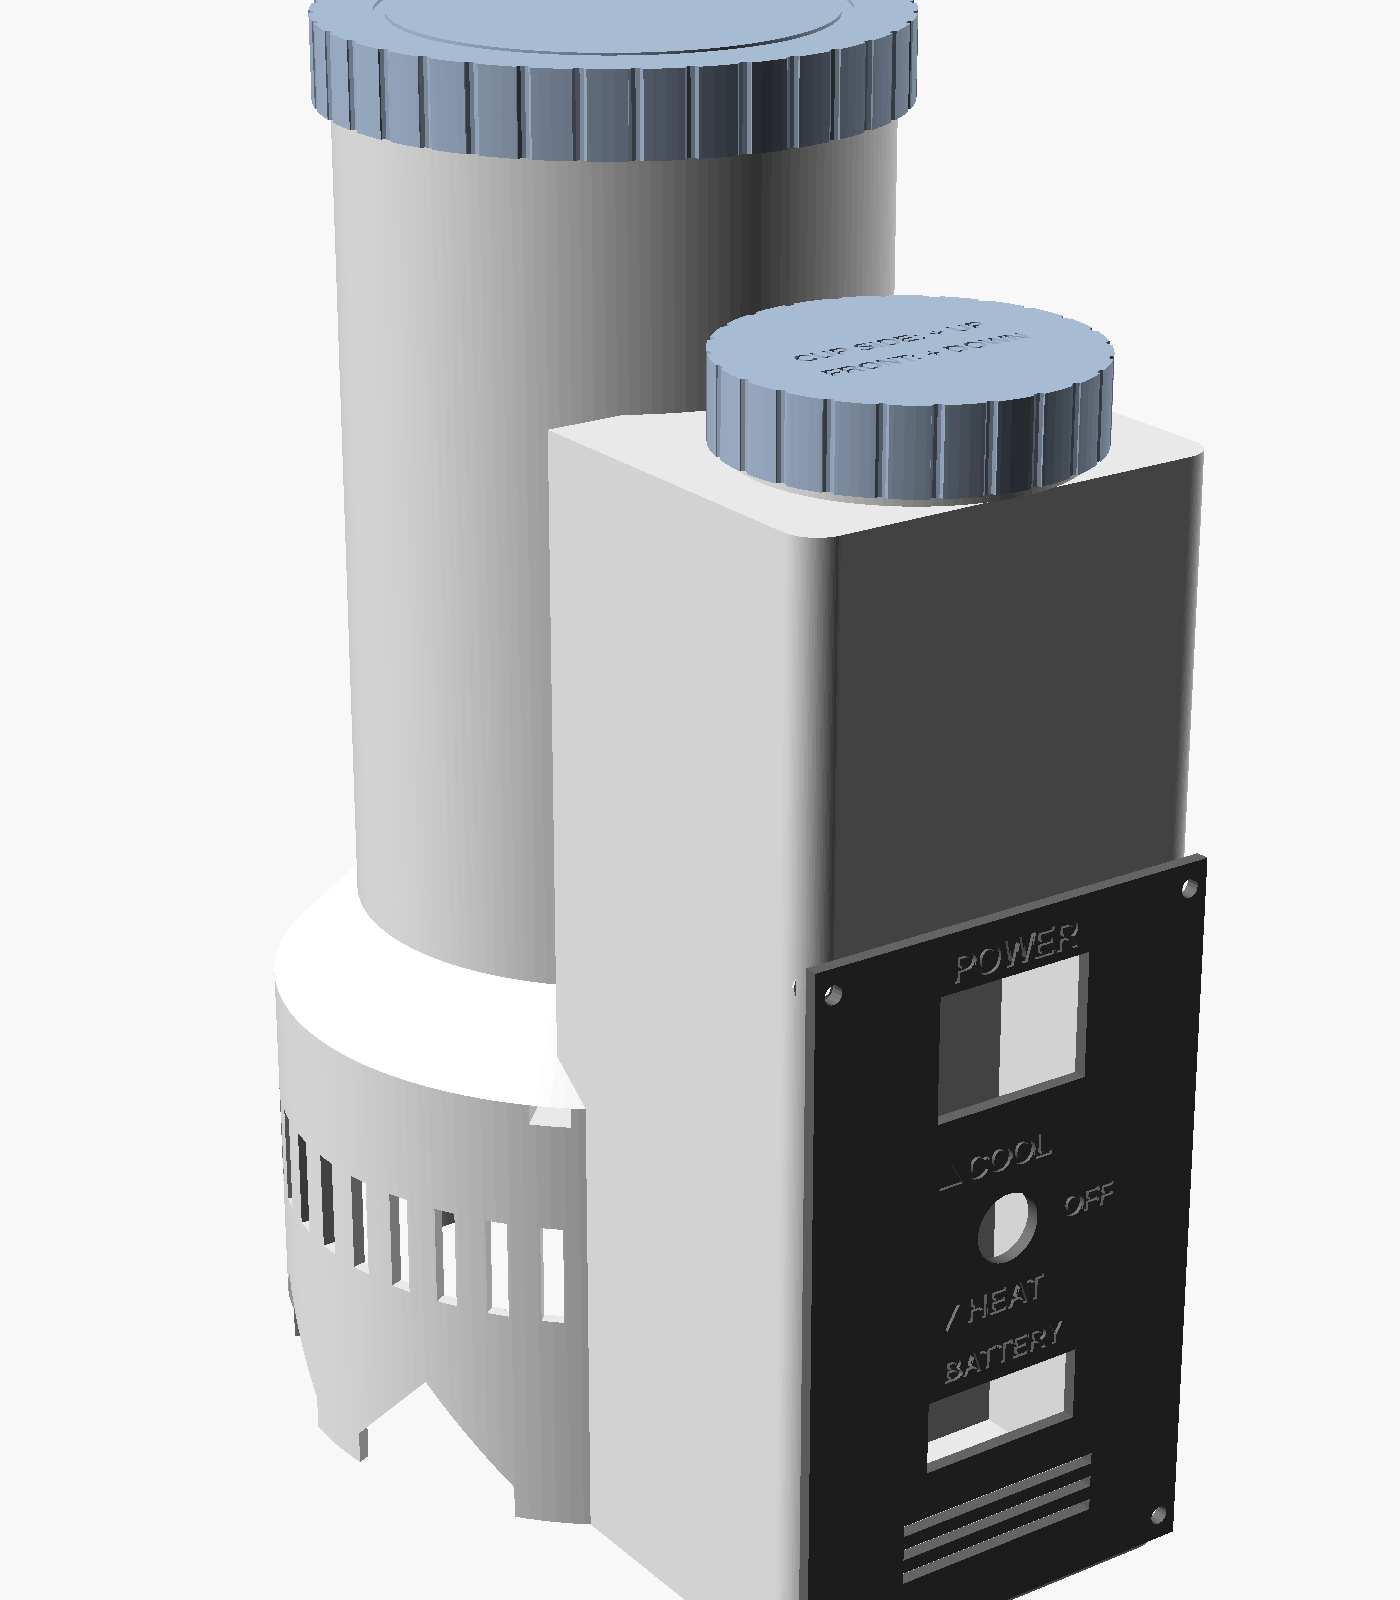
A tall capsule you drop a 12 oz can into (a 16 oz tallboy just fits). Flip the switch to Cool and it chills the can; flip it to Heat and it warms it. It runs on four rechargeable batteries for about an hour and a quarter, and you take them out to charge them.
There's no Arduino in this one: it's simple switches, so there's nothing to program. The hard part is the design, and that's what this page shares: the print file, the editable design, and a full manual like a real product would have.
How it works
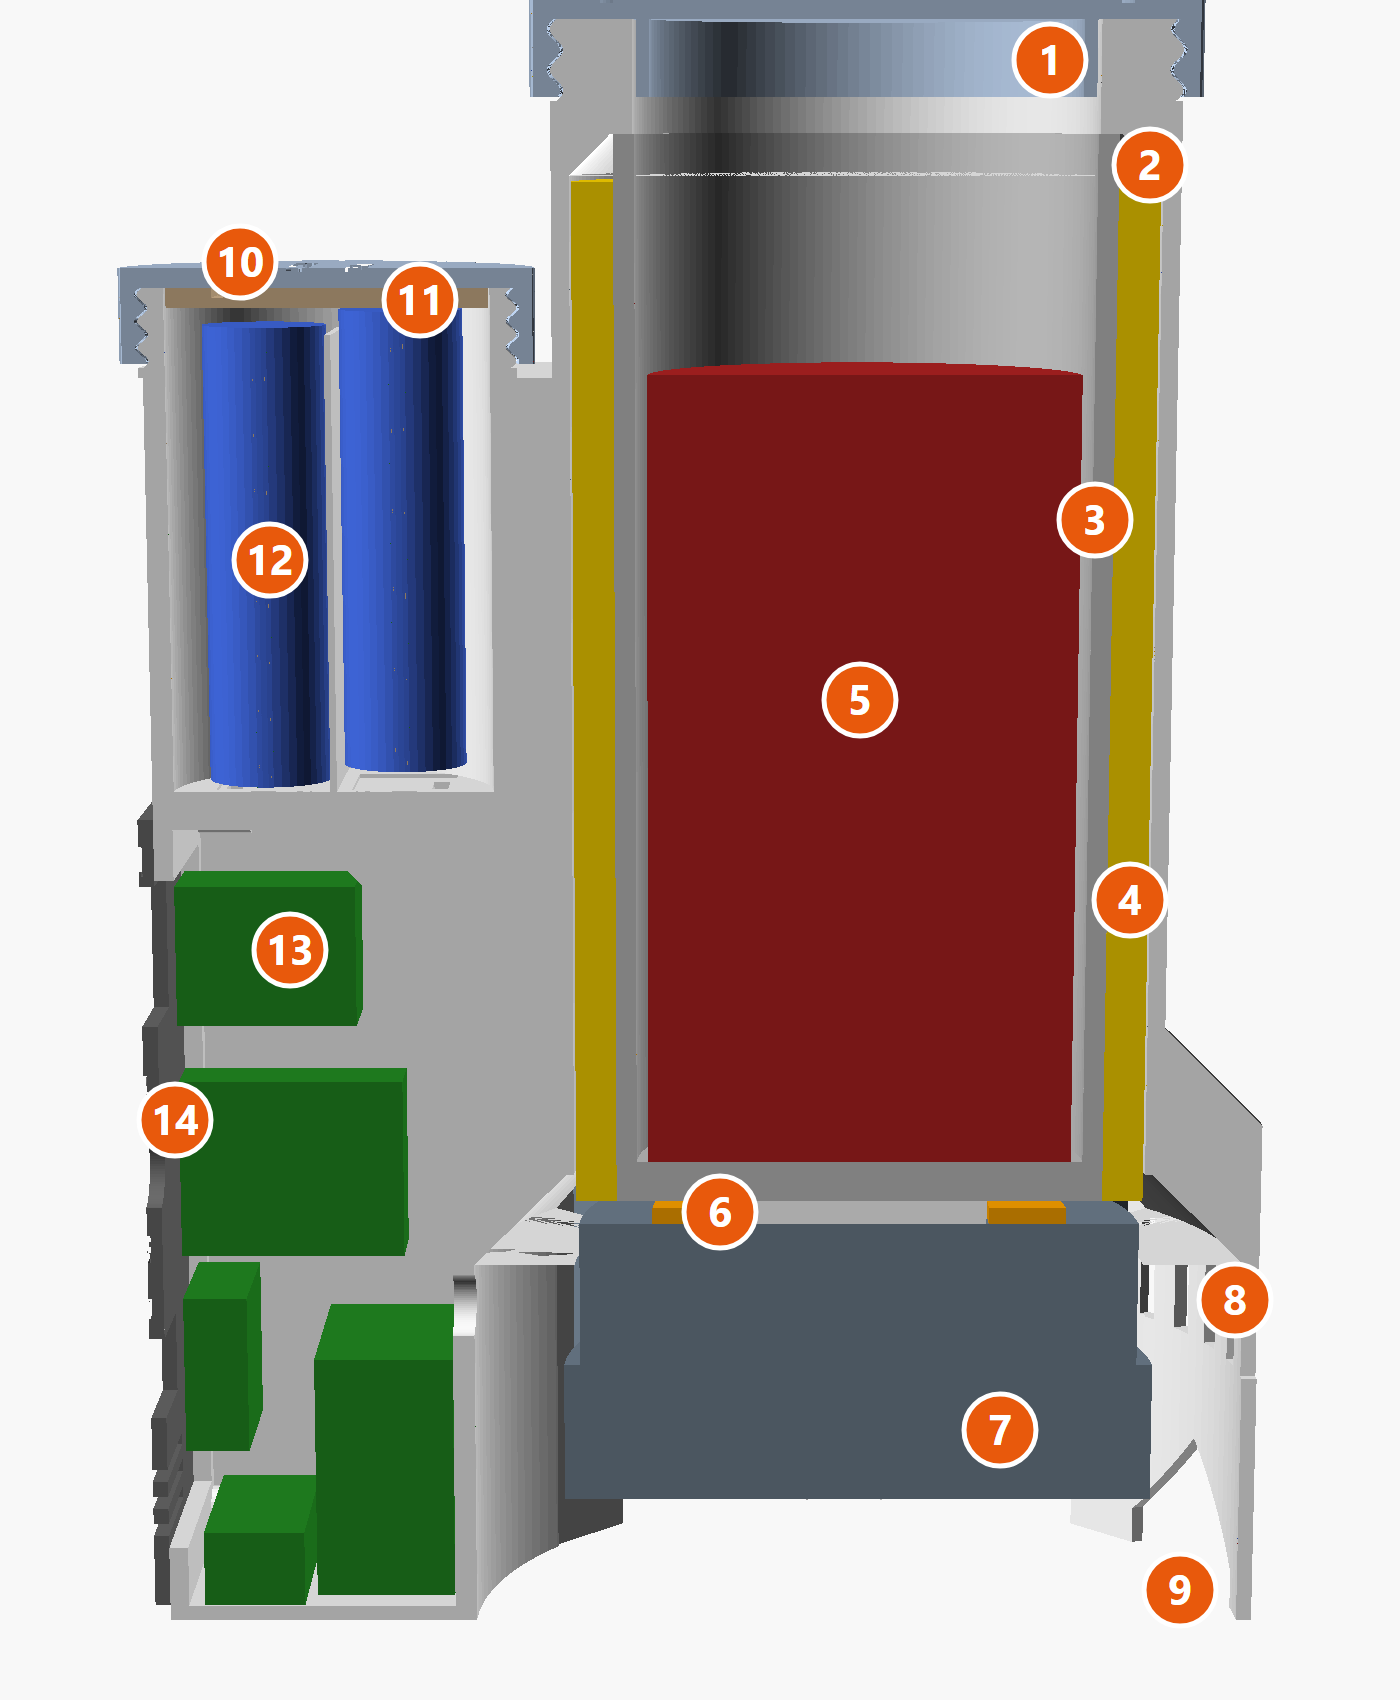
- A Peltier tile is a thin heat pump. Power it one way and its top gets cold while its bottom gets hot. Flip the power and they swap.
- The tile sits under an aluminum cup, so the whole cup gets cold (or warm) and the can inside with it. Foam around the cup keeps the cold in.
- The waste heat has to go somewhere, so a CPU cooler (upside down, fan at the bottom) blows it out between the capsule's feet.
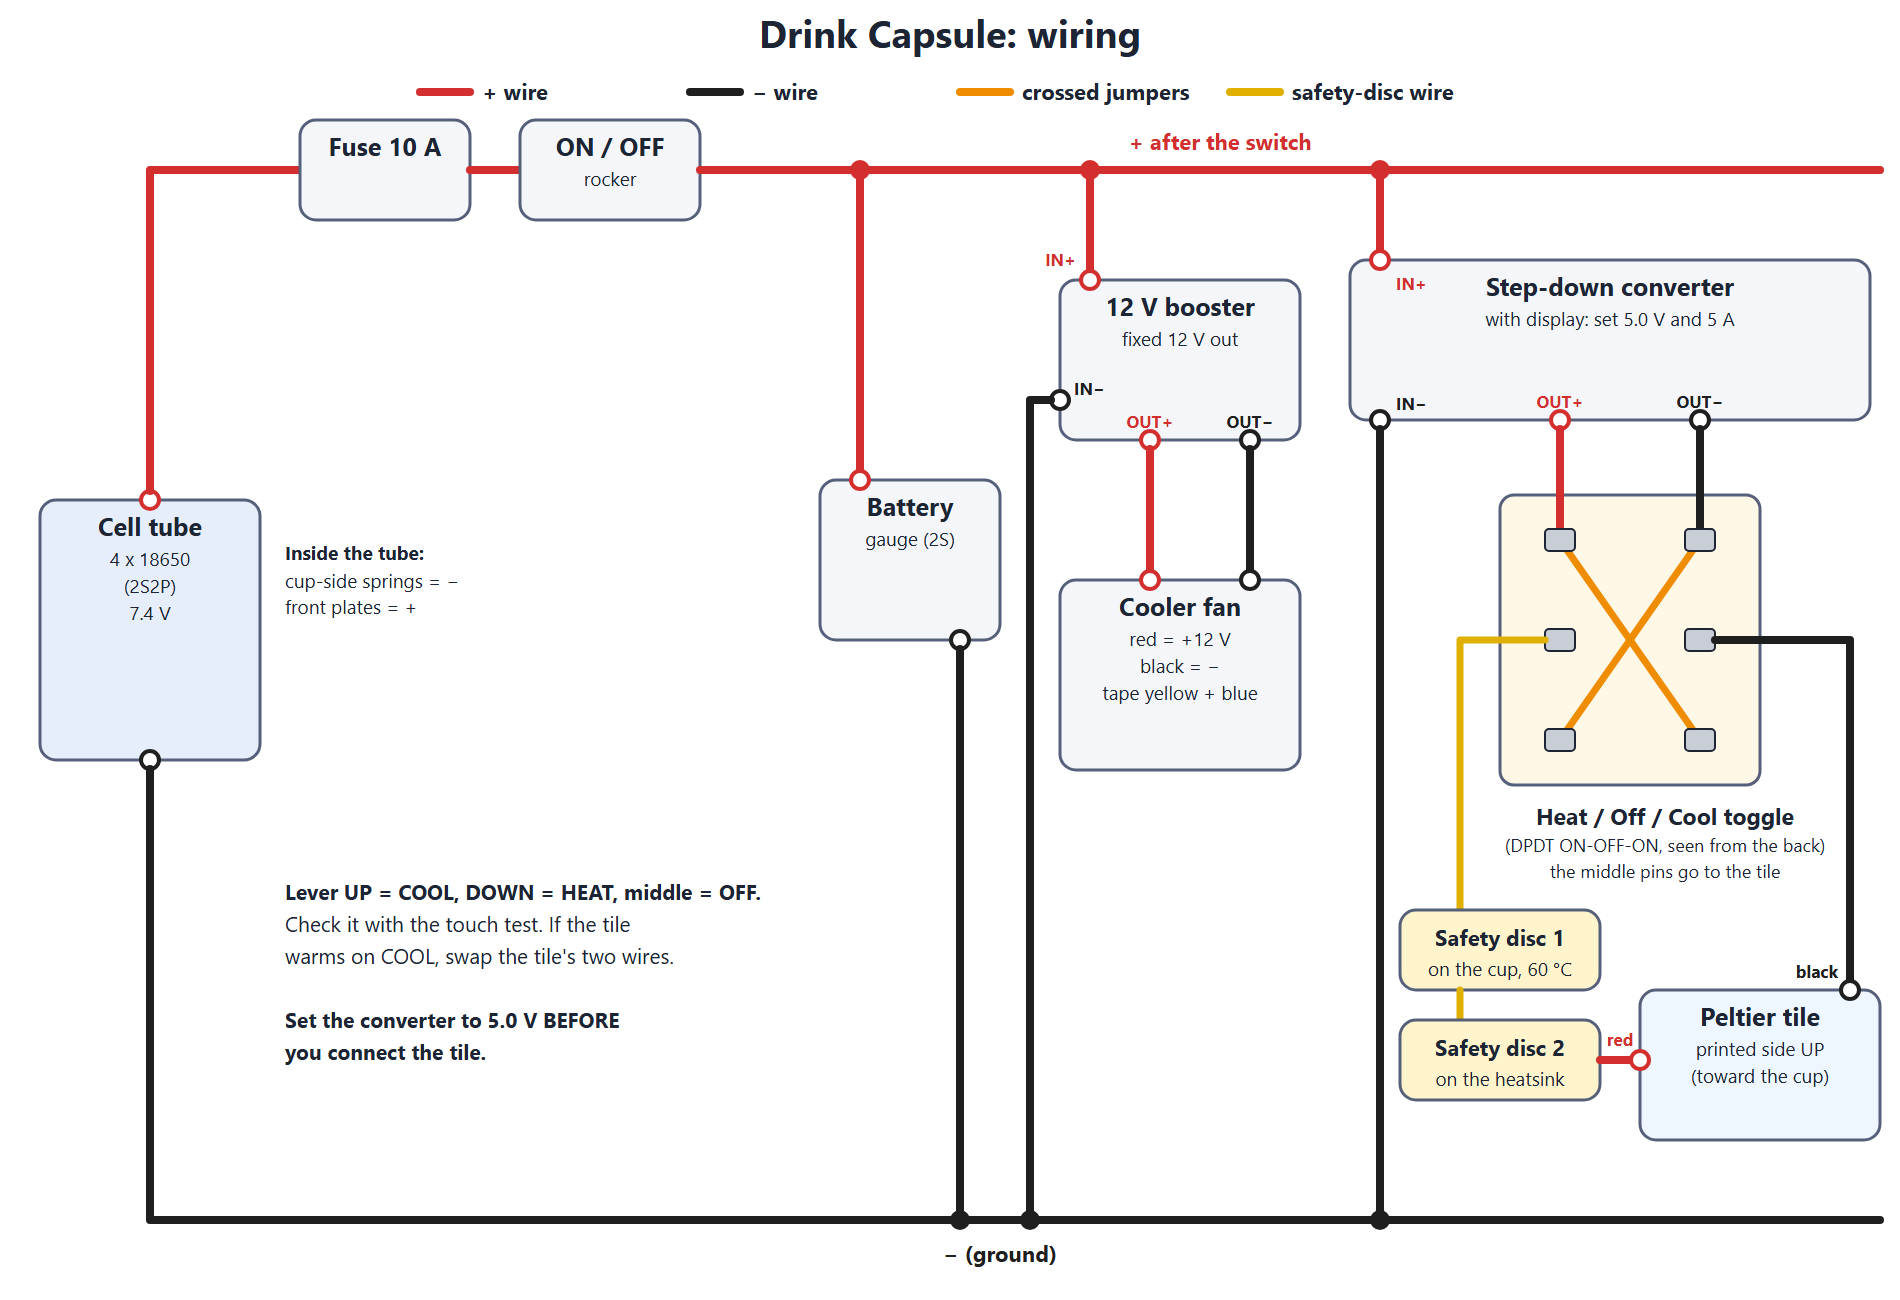
- Running it gently at about 5 V instead of the tile's full 15 V wastes far less power, which is how four batteries can last over an hour.
- Safety: a fuse, and two safety discs that cut the power if anything reaches 60 °C.
The batteries
Four 18650 cells, two pairs in series (called 2S2P), in a screw-cap tube on the front. The contacts are keyed so a cell put in backwards simply doesn't connect.
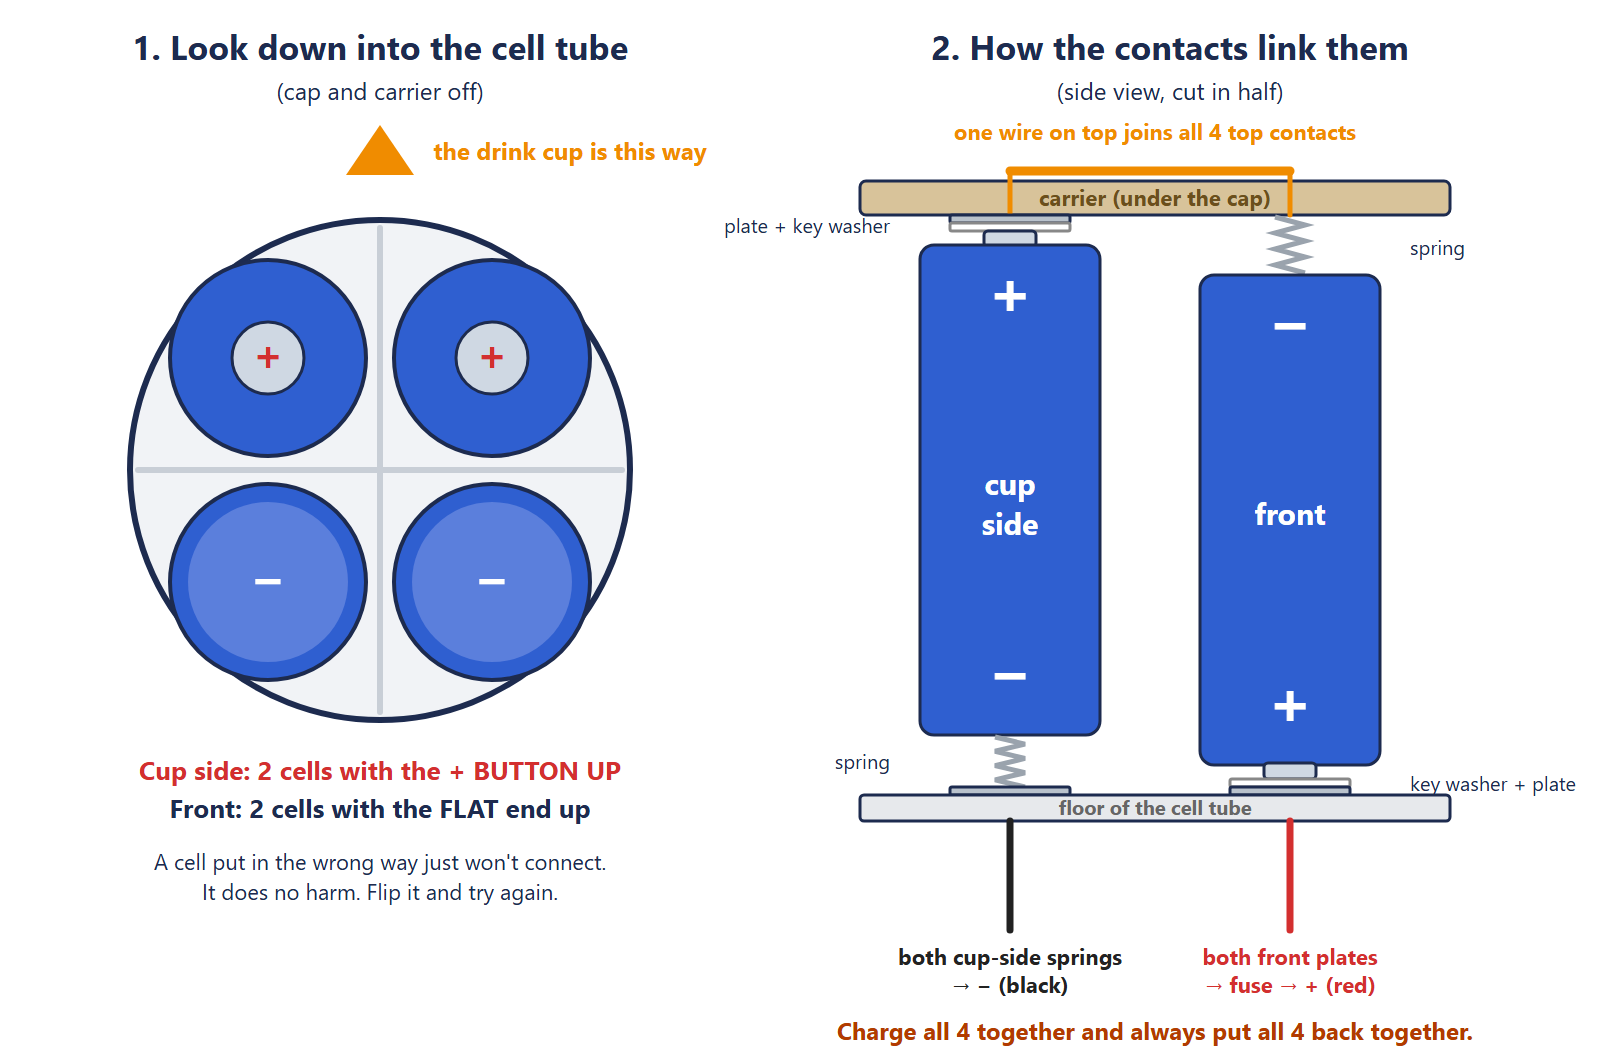
Warning: 18650 lithium cells are powerful. Use protected cells from a real battery shop, all the same model, and never let their ends touch metal. Charge them in a proper charger.
The wiring
Printing it
Every part fits on one 256 mm plate: the body, lid, cell cap, front panel, cell carrier, tile frame and key washers. The lid prints inside the hollow base.
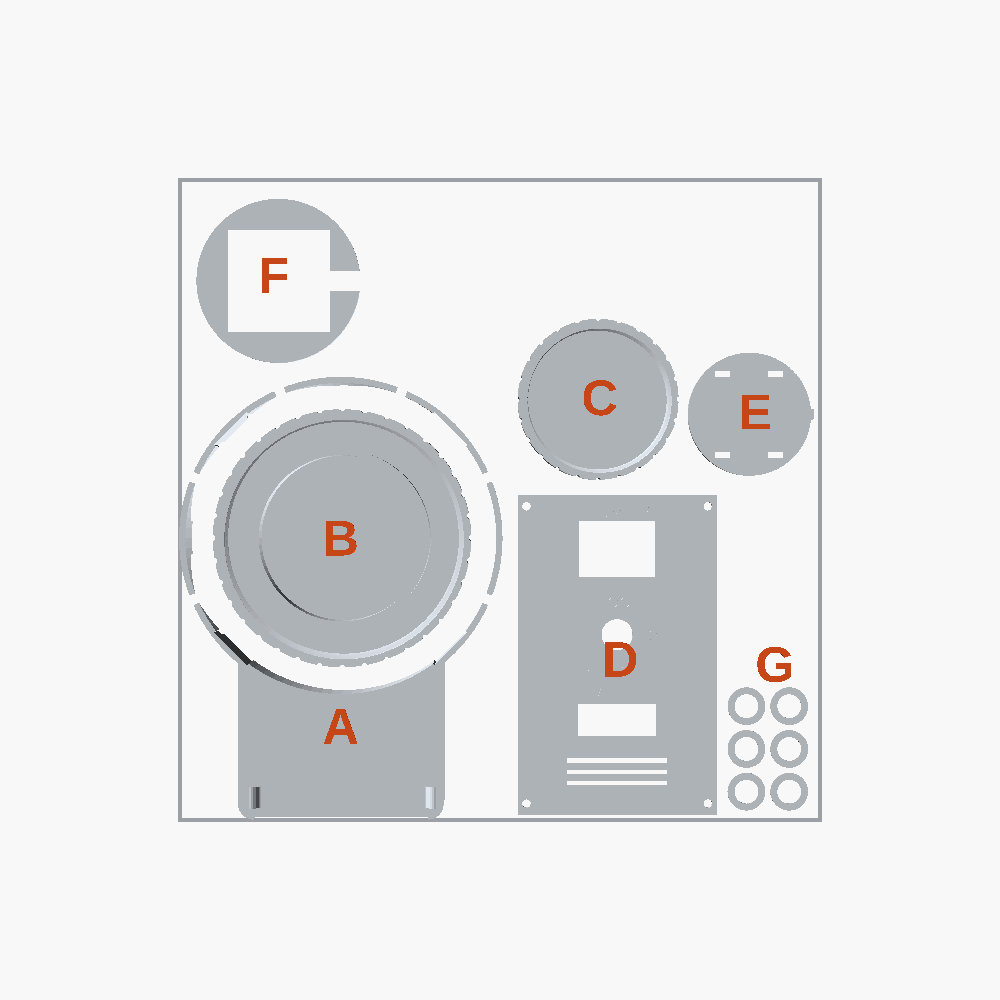
Settings: PETG, 0.20 mm layers, 4 walls, 15% gyroid infill, no supports, brim on. The body is 248 mm tall, just under the X1C's 250 mm height limit in Bambu Studio.
Tip: Bambu Studio says the file isn't from Bambu Lab and only the shapes will be loaded: click OK, that's expected. And don't press Arrange, or the lid gets moved out of the base.
Building it
The manual has all 14 steps with pictures, from gluing the disc into the tube to the touch test that checks the tile heats and cools before you close it up. Download it below.